Thursday, 12 May 2016

Get to Etsy!

Hi All

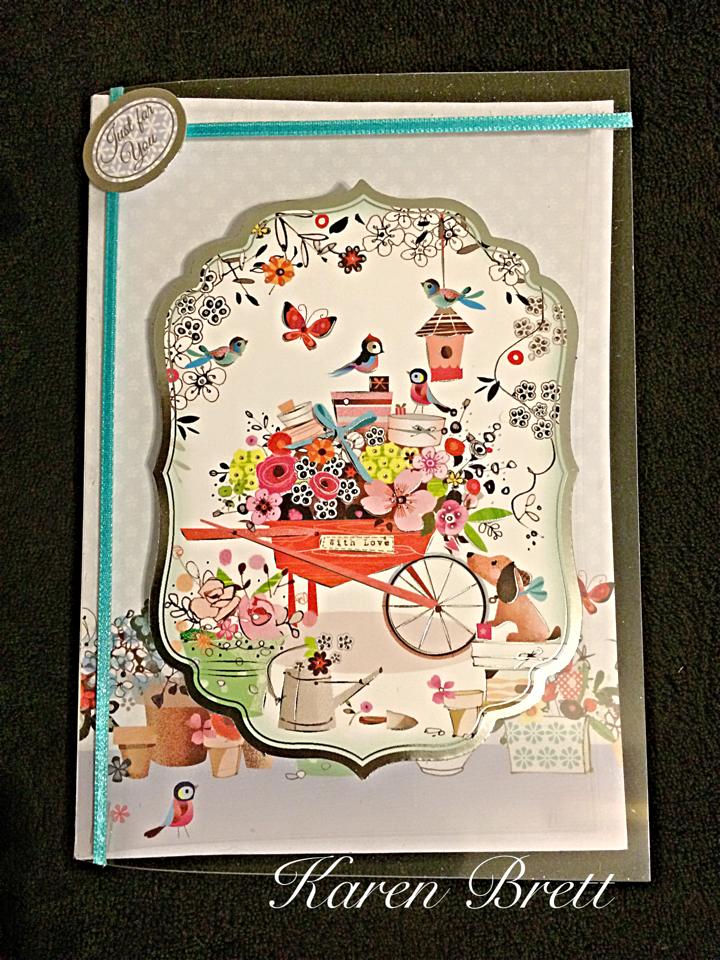
I am delighted to inform you that some of my most popular products are back in stock on Etsy.

New products are on their way! So keep checking my Etsy shop for my marvelous makes.

Come and shop.


https://www.etsy.com/uk/shop/KazBeeCrafts?ref=search_shop_redirect

Sunday, 8 May 2016

Coming Soon!!!

Hi All,
I've been a busy Kaz Bee! (pardon the pun)
At the moment my Etsy shop is looking empty. But keep an eye out as I'll be adding new items soon!


Thursday, 7 April 2016

Tonic - MDF - Lyon Unit

Hi All

I've had this Tonic MDF a little while and I've just got around to decorating it.


I assembled the unit together, using the Tonic glue which came in the kit.  It's held it together nice and sturdy.

I then painted the whole unit with Tonic Nuvo Acrylic paint in Ivory.  Although the colour is called Ivory, it's actually quite a rich cream, almost custard colour. I actually paint in fairly thin coats and keep building on them.  The paint is a good quality, quite thick and gives good coverage. I've only used about half a pot on the whole unit.  Only the base wasn't painted.  

The edges of the papers and the backing cards were coloured gold with Pinflairs Buff-it.  It gives an excellent coverage and blends well with the Ivory paint. 


I used Crafters Companion A3 Springtime double sided card. It's 300 gsm and provides an excellent decorative  addition in keeping with the design and theme of the unit, that I have chosen. 


I am really pleased with the finished piece, hope you like it too.  I may yet put brass handles on it but just can't yet decide. 

Thanks for dropping by - happy crafting!


Monday, 21 March 2016

Alice in Wonderland

Hi All

After an absence I'm back to blogging, never stopped crafting, just didn't blog!!!
Here's my latest creation; a quickie card for my niece who's an avid Alice in Wonderland fan.
I've used a Debbie Moore CD for the images. The toppers section provides the opportunity to decoupage and I went a step further by removing the central section of the second layer to create more depth.

I used black card for the card base, Miri card for the next layer to add a bit of pazzaz!


The harlequin black and white backing is part of the base layer with the main picture.  The second layer, the first of the decoupage is only of the picture (without the harlequin edges).  I removed the central section with a craft knife to provide more depth; the last layer is a carefully cut Alice.
The special wishes banner is slightly curved, again to add interest.


I hope you enjoy this view through the looking glass.

Hugs

Kaz Bee xxx

Saturday, 30 May 2015

HunkyDory - Boutique Chic

Well hello there!

Hunkydory did it again with another fantastic kit called Boutique Chic available from Create and Craft at a really fab price.   The kit has concept cards, bags to make which hold notelet cards, or be creative and turn them into little books.  It is such a lovely fun kit with beautiful designs and of course excellent card stock that does not crease but folds without cracking.

Here's just a few of my makes, cant wait to experiment some more.

Thanks for dropping by :)


Friday, 22 May 2015

Kathryn Sturrocks - Sugar Buttons CD

Hi All

If you love Kathryn Sturrocks, Sugar Buttons creations as much as I do, then please watch out for the launch of her new CD to premier on Create and Craft.  Unfortunately the date of the show had to be moved and it is now on at 1 p.m. Wednesday 27th May 2015.  The channels for Create and Craft are
674 - SKY & 36 - Freesat

Here are just some of the creations I have made with her moulds. I'm sure the CD will be a great success for her.


Saturday, 9 May 2015

Hunkydory - Fun in the Sun - New Launch

Hi All

Well take a lookie here!!!!!


Launched yesterday on Create and Craft, Hunkydory's the new
'Fun in the Sun' Kit is available as a bundle and includes the fantastic Decoupage kit, Little Book of Summer, Inserts and Free Adorable Scorable.  The offer is only available for this week - so don't miss out.  The colours are bright and there is beautiful gold detailing added to the designs.


 I had great fun with the kit, which has decoupage suitable for all tastes and ages, including men!!!! Who are unfortunately sometimes difficult to make cards for.

The kit is essentially decoupage, but  all the layers pop out easily and you can use all the layers on one topper, or create more toppers by only putting three layers to each picture.  Because the card stock, pictures and quality is sooo good, you get perfect results; however, you choose to use them.  


Don't forget to get yours!!!  Definitely a good for all seasons and good for all, card range

Sunday, 26 April 2015

Handmade Purse - Kirstie Allsopp Coin Purse Kit

Hi All

A sewing make this time.


I had a Kirstie Allsopp kit bought as a present for me and so made it my make for today :)

Here's the lining, already to sew. (I did actually press it first - not as it looks here).  The main fabric which is the outside has iron-on interfacing applied, before it is stitched.


And now the main outside layer (shown inside out)  with the 'sugar bottom' made to give it a gussett.


The outer layer is placed inside the lining, stitched all around accept for approximately 4cm, which allows for the turn through.   The clasp is added by basting across the frame and into the fabric, this is worth doing to ensure that the purse is sewn evenly into the frame.  Running stitch is sewn through the holes of the frame and on reaching the end on one side you reverse the running stitch which forms like a back stitch and a strong attachment of fabric to the frame. You then complete the otherside of the frame in the same way.


And there you have a completed purse.
With contrasting lining.


Although this purse is called a coin purse, it is actually a good size and I'm going to use it as a make-up bag for my handbag. Enjoyed this little make.

Thanks for dropping by - Happy Crafting :)


Friday, 10 April 2015

Stitched Hearts - Red Work

Hi All

Had a change and did a little stitching.


I made some felt white hearts which I blanket stitched and stuffed with toy filler and then I  embroidered the fronts with designs I made up using various embroidery stitches.  I used Cotton a Broder thread in a deep red, which is beautiful for embroidery.  

Hope you like them :)

Best wishes

KazBee xxx

Wednesday, 8 April 2015

WOW - I'm a Design Team Member for Hunkydory


Oh my stars, I'm chuffed to bits and fit to burst.  I've been selected to be a member of Hunkydory's Design Team and I can't wait to start.

I love the quality of Hunkydory's paper and cardstock, especially the adorable scorable card which does not crack on folding and I have used their products for many years, always being pleased with the quality and results. You can see through many of my past posts some of their products over the years.

I can't wait to start to get crafting and sharing with you my makes.

Crafty hugs

KazBee xxx

Thursday, 2 April 2015

Happy April Everyone

 Home grown flowers


Hope you like these cards, made with my own original photography and home grown rose!!!!!

It's a grey day but it's sunny in my heart, cant wait to get crafting again this morning.

Wishing everyone a wonderful Easter time xxxx


Tuesday, 31 March 2015

Easter Treat boxes - Bunny Style

Well Easter is only a week away, so I have made some little treat boxes.


Little Boxes all ready to go!

And the recipe is:

Ingredients:

Stampin' Up Curvy Box die
Die Cutting machine (I used my Grand Caliber)
White Card for boxes (Adorable Scorable, ideal as it doesn't crack on folding or Centura Pearl)
Washi tape in various spring designs
Ranger, Tim Holtz, Distress Ink in Spun Sugar
alternatively for the above use pink card, or an alcohol marker to colour white card to pink.
Ink applicator sponge or cut and dry.
Punches in the following shapes and sizes:
Large oval
Large scallop oval, just slightly larger than the plain oval
Circle punches, sizes; 1 3/4",  5/8",  3/8", 1/4"
Black pen
White pen, or white black board pen.
Cosmic shimmer glue
Tape pens
Dimensional glue stickers (sticky pads)
Mini eggs or any treats you wish to add - have fun in filling :)

and the method folks is:

Die cut the box halves and then before assembling, add the washi tape to the lower section of the boxes at the desired height. I positioned mine at approximately 5mm from the base on all four sides.

The boxes were assembled with the cosmic shimmer glue.  I find this has a quick grab and holds the boxes secure.


Now to make the faces :)


These are the pieces needed to build the face


Use this to help with assembling

Punch out all of the pieces for the faces and get ready to have some fun. I added distress ink to all the edges of the white card pieces except the scalloped ears.  To layer the pieces I applied adhesive to half of the round white cheek pieces and placed them so that the tops met roughly in the middle of the circle towards the lower half, this allows enough room then for the eyes to be adhered behind the cheeks and the pink nose placed to cover the centre gap. (You can place the eyes first and then the cheeks, I just found that it was easier for me if I placed the cheeks first and built around them).  I drew the eyebrows in, added teeth and the little dots on the cheeks for where the whiskers would come from. The white pen added the highlights to the eyes.  Experiment with the eyebrows and the eye highlights, you can get all different expressions by playing with these!

The faces were then applied to the boxes with a sticky pad (dimensional sticker).  The next fun part comes with the filling - I'm going to fill them up with mini eggs - yum yum!!!  Off out to buy them now as just found that hubby has eaten my stash of them -  lol.

The boxes can be opened without effecting the little faces; have fun and enjoy.


Thanks for looking; more coming real soon.

Crafty Hugs, Kaz xxxx


Monday, 30 March 2015

Butterfly Wishes - Hunkydory - On a blustery Spring Day

Hi All

Well it's a beautiful day here on the South Coast, much better than yesterday which was very windy, dark, gloomy and grim!!!! Anyway, thought I would post my make from my Butterfly Wishes Kit from Hunkydory to brighten up the days.

Front view of my Butterfly Wishes

'The recipe today folks is': 

Ingredients:  Adorable scorable
                       Butterfly wishes kit
                       Tonic Die
                       Tonic Butterfly punch
                       Pink chiffon ribbon
                       Cosmic shimmer glue
                       Dimensional squares
                       Stickles crystal glue
                       Scoreboard
                       Paper trimmer

Method:  I used A4 Adorable Scorable card which I trimmed and scored to create a gate fold card. I then used a Tonic Butterfly die to create the design on the front of the card.  The die produces a beautiful open lattice work design which is cut in two halves, on each side of the opening.  The Butterflies are part cut from the card and so it is possible to lift the wings for dimension. I used decoupage pieces from the main topper (used on the inside) and attached them to the front of the card, with dimensional stickers. I punched six butterflies out of paper from the kit in pale pink polka dot and pale blue polka dots, these were assembled into pairs, lifting the top layer wings and then adding  Stickles glue to the bodies of the butterflies, providing a little bit of sparkle. Cosmic Shimmer glue was used to attach them to the card.  The inside section of the card was backed with the paper from the kit which co-ordinates with the set of the butterflies on the front.  The topper was applied with dimensional stickers, including a layer of decoupage and  finally the sentiment was added and the ribbon threaded through the lattice - and 'ta dah' - a lovely Hunkydory Card that I am very proud of.  Another variation to this is to emboss the card before scoring and die cutting.


 Off to make some Easter boxes now; be back soon with some makes, take care and thanks for dropping by :) x


Saturday, 28 March 2015

Easter Bird House - Hunkydory

Hi All

Well with Easter fast approaching here's my Easter Bird House Tree, a little bit of home decor with the lovliness of Hunkydory.


I have used the Bird House Kit by Hunkydory, which is divine, to create this little piece. 

Here is a list of all the ingredients used:

My Lovely Little House

One of the die cut bird houses
Tin Pail (the little bucket for the base)
BBQ skewer (cut to size)
Cream Spider Web Ribbon
Fir tree wrap, with leaves (on a spool)
Paper flowers, cream and lilac petals
Oasis (dry, for filling pail and adding flowers)
Hearty air dry clay
Lace
Crystal dots
Two sizes of flower punches
Velcro
Dimension squares
Double sided tape
Cosmic Shimmer Glue
Scissors
Chocolate mini eggs – yum, yum!


"And the recipe today folks is": Cut the oasis to size to fit into the pail. Push the BBQ skewer into the oasis, ensuring that you have cut it to the desired length.  Apply double sided tape to skewer.  Wrap the foliage around the skewer and trim accordingly.  I used the Air Dry Clay to support the post by adding a piece under the box around the skewer and a little inside, then mould to appropriate shape, this can then be covered with foliage before or after it has dried with glue.  The flowers were added to the foliage and secured through the oasis to give the effect of a climbing rose. The Bird house was assembled but the roof eaves were snipped at either side in the middle, to allow for one side to be lifted for box access.

Hinged lid - look at all those little choccies - mmmmm


 Acetate was added to the front entrance (so the choccies don’t fall out) and a circle topper added. The birds have been added with sticky dimension squares to add depth. Velcro added to both side of opening section of lid.  I punched out some flowers from the scraps between the die cuts to keep the theme and colours running through and crystal embellishments were added to birds eyes and the centre of the flowers.  The cream spiders web ribbon was added to keep the rustic feel to the project and a little bit of lace added to the base of the birdhouse.  My little bit of Easter home decor.


Many thanks for dropping by xxxx